Find the most likely odor source
Notice when the smell is strongest before taking the machine apart. Timing does not prove the source, but it tells you where to check first.
Swipe to see all columns.
Drawer and upper rim
A fresh bag does not clean the drawer. Remove the liner, then inspect the interior, corners, rim, and area above it for residue or leaks. Clean and dry the drawer as your model allows, then install the new liner flat.
Filter pocket and seal strips
Replace an old, damp, or damaged carbon filter rather than washing it. Clear litter and hair from the brush-style seals, and replace strips that are flat, loose, curled, or peeling.
Globe, entrance, and waste port
Empty all dry litter first. Clean every approved washable surface, including below the litter line and around the waste opening; check the model's internal pockets for trapped clumps. Rinse away cleaner and dry completely.
Base and nearby surfaces
With the globe removed, clear dry debris from accessible ledges and the waste opening using your model's approved method. Then move the unit and clean the step mat, floor, wall, and any nearby washable fabric.
Clean without damaging the machine
- Follow the manual for your exact model. Wash only approved parts, and never submerge, spray, or soak a powered base or control panel.
- Clean sensors only with the model-specific method. If liquid entered the base, keep the machine unplugged and contact the manufacturer.
- Let every washed part dry completely, reassemble correctly, and supervise one test cycle.
What can remain below a clean-looking globe
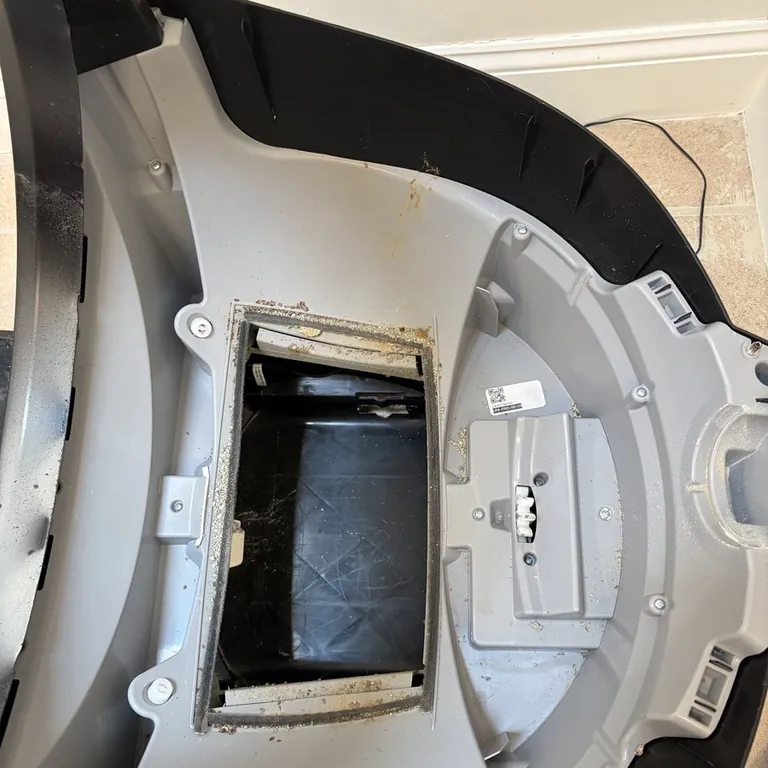
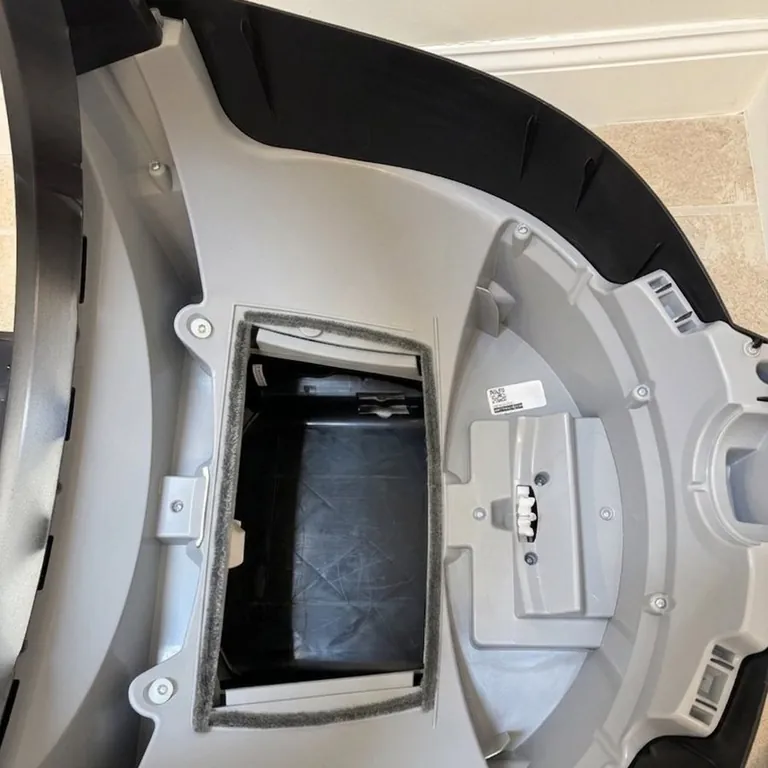
Litter-Robot 4-specific checks
- Whisker allows soap and water on the drawer; dry it and install the liner flat because a stretched or bunched liner can affect the drawer-full reading.
- The carbon filter sits on the lower exterior of the globe above the drawer and lasts approximately one month under normal conditions; replace it rather than washing it.
- Replace seal strips when they are worn flat or peeling, and keep strips attached to the base dry.
- Small clumps can collect inside the globe's internal pocket. Empty all dry litter before adding water so it does not become clay-like buildup.
How to keep the odor from returning
- Seal old litter and waste, and replace a leaking or poorly fitted drawer liner.
- Clean the mat, floor, wall, and nearby fabric so the room does not make a clean machine smell dirty.
- Use compatible litter at the fill line, reset the scale when required, and check the drawer before it is full.
- Replace filters and worn seals when due, and improve airflow instead of adding heavy fragrance.
For the full teardown, use our complete cleaning guide. Our model-based schedule helps keep the same buildup from returning.
Know when cleaning is not the answer
- Contact the manufacturer: liquid entered the powered base, a component looks damaged, or a machine fault persists after correct drying and reassembly.
- Consider professional cleaning: buildup is extensive or you do not want to handle the model-specific teardown.
Sources and model notes3 references
- Whisker: Litter-Robot 4 deep-cleaning guide (opens in a new tab) — washing, drying, drawer, base, and bleach precautions
- Whisker: Litter-Robot 4 use and care (opens in a new tab) — cleaning cadence, filter life, and seal-strip care
- Whisker: Litter-Robot 4 sensor-cleaning instructions (opens in a new tab) — model-specific sensor care
LitterReserve is an independent cleaning service and is not affiliated with or endorsed by Whisker. Litter-Robot is a trademark of Whisker.